Oct 15 2015
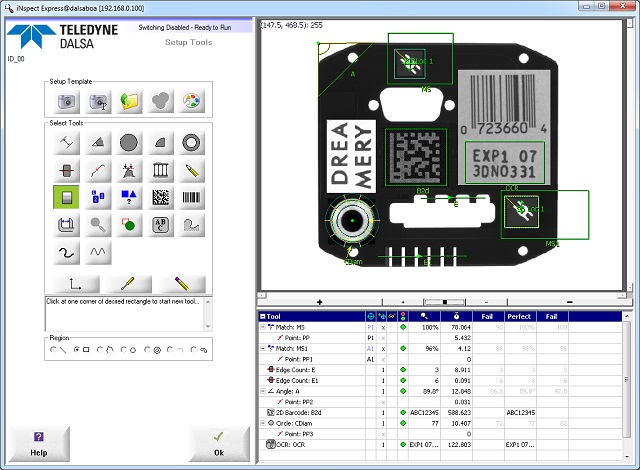
The Boa series of smart cameras and the Geva range of multi-camera vision systems from Teledyne DALSA now benefit from the new iNspect 1950 vision application software. Also available for 3rd party PC-based vision systems, iNspect 1950 provides a number of new tools and processing functions to improve factory floor vision measurements.
 The Boa Series
Specifically designed to simplify the design and deployment of automated inspection, and featuring a 4 point calibration method for improved measurement accuracy, iNspect vision application software now also includes print verification and thread measurement tools, while the functionality of other tools has been further improved.
In addition, 5 new pre-processors (normalize, zoom, shear x, shear y and threshold) have been included to enhance or accentuate features of the image in order to increase measurement tool accuracy or robustness. These can be selectively applied to any region of interest on the image. ?
The new ‘Verify’ tool can identify print defects by comparing a template to an object in the image and reporting how much the object differs from the template. The tool can be trained on a series of known good examples to learn a range of acceptable variations.
In addition, regions containing variable features that are not important for the overall inspection process can be masked so they don’t influence the overall result.
A new ‘Thread’ tool can measure the inner and outer diameters pitch, angle and length of a solid, threaded object such as a screw. If the ends of the shaft are inside the "end cap" area, the length of the shaft can also be measured.
A masking capability has also been added to the existing ‘Match’ tool used for pattern matching in general. Again this allows masking of unimportant or unreliable areas of the trained pattern which are then ignored when matching against the object. In addition to masking, the new software allows adjustment of the ‘edge search’ parameters which allows the search algorithm to be optimised for robustness and/or speed.
A focus measure capability has been added to the ‘Intensity’ tool to help validate the optical set-up. This can be useful in determining why a part fails, for example if the distance from the camera to the part has changed or the lens has been adjusted or a feature on the part has been poorly printed.
Other new features in this latest version of iNspect include tool cloning, which allows identical copies of a given tool to be made so it may be used to inspect the same feature in multiple locations on an image. The ‘Bead’ tool can now automatically trace the bead path until it breaks or fails to meet the set-up criteria. In addition, new scripting functions have been added.