Oct 9 2015
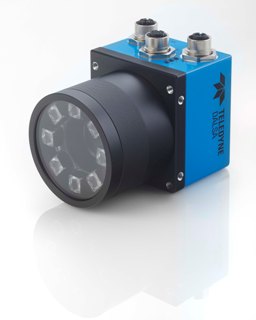
With resolutions up to 5 Megapixesl, inspections up to 80 parts/second, enhanced embedded measurement and processing software, and a variety of I/O and mounting options, the versatile new Boa 2 smart camera from Teledyne DALSA can automate identification, measurement, guiding and verification requirements in a host of applications.
 Dalsa Boa2
A choice of 2, 3 and 5 Megapixel sensors makes Boa 2 capable of imaging small defects that can be missed or difficult to distinguish with lower resolution cameras. In addition the increased number of pixels gives higher measurement accuracy for precision measurement applications and a larger inspection area for verification applications which makes new applications accessible for Boa 2 users.
The versatile Boa 2 range offers both integrated and externally controlled lighting configurations. An optional integrated high-intensity ring light is available for the 2 Megapixel version to provide compact, uniform target illumination, while all versions offer a direct connection to external light sources including power and strobe control. The camera is rated for use in harsh industrial environments and provides several mounting options on the front, back and side surfaces. This saves time during the development process and unnecessary expense for protective housings.
The camera features a dual-core 1.5 GHz processor to drive the well-respected iNspect Express embedded processing and measurement software. Its comprehensive toolset has been further enhanced with a number of new tools to add to its existing capabilities for pattern matching, precision measurements, flaw detection, colour ID and verification, presence/absence of features, robot guidance, part identification, 2D matrix reading, barcode reading and Optical Character Recognition. These new tools include multi-point calibration, match tool masking, a trainable verification tool for defect detection and a measurement tool for thread inspection.
The new four-point calibration method enhances measurement accuracy, while match tool masking allows unimportant or unreliable areas of a trained pattern to be ignored when using the tool to match against a trained template. The new trainable verification tool identifies print defects. It compares a template to an object in the image, and reports how much the object differs. The tool can be trained on a series of known good examples to learn a range of acceptable variations (a range of good parts). The new Thread tool measures the inner and outer diameters, pitch, angle and length of a solid, threaded object. If the ends of the shaft are inside the "end cap" area, the length of the shaft can be measured.