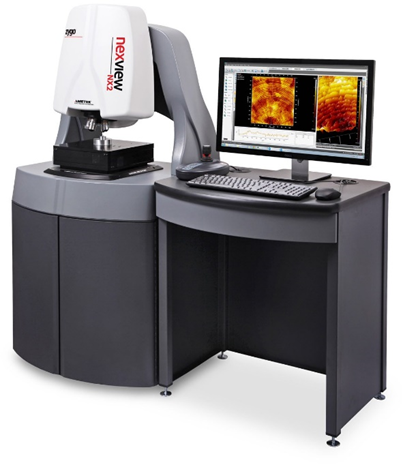
Tailored for even the most demanding tasks, the Nexview™ NX2 3D optical profiler integrates unparalleled precision, sophisticated algorithms, versatile application capabilities, and automation into a unified solution, marking ZYGO's pinnacle achievement in Coherence Scanning Interferometric (CSI) profiling technology.
By providing sub-nanometer precision at all magnifications and measuring a greater variety of surfaces more quickly and accurately than other comparable commercially available technologies, the fully non-contact technique maximizes return on investment.
Nexview NX2 is a profiler that does not compromise, offering a wide range of applications for almost any surface and material, including flatness, roughness and waviness, thin films, step heights, and more.
The Nexview™ NX2, the newest flagship model, offers a plethora of unique capabilities aimed at improving, speeding up, and enhancing customers' metrology:
- A large-area, high-sensitivity 1.9 MP sensor allows for capturing more images in a single measurement.
- Automated part focus and setup minimize operator variability and training while reducing the time to data.
- Gage can perform with exceptional precision and repeatability for the most demanding production applications.
- High-speed measurements take only seconds to improve productivity and process control
- SmartPSI™ technology for ultra-fast profiling of ultra-smooth surfaces; vibration-resilient metrology with SureScan technology and built-in isolation offers high-quality metrology even in vibration-prone settings.
- 2D and 3D correlation yields results that meet ISO 25178 and ISO 4287 standards, giving confidence in measurements.
- Mx™ software for measurement automation, analysis, and instrument control
- Enhanced vision using True Color imaging.
- Users may maximize instrument versatility and optimize the field of view with the three integrated zoom lenses thanks to the variable image zoom feature.
The Only Profiler Needed
The kind of surface users wish to measure is no longer a determining factor when choosing a profiler. The topography of almost any surface, from a highly polished optical surface with sub-Angstrom surface roughness to steep machined angles up to 85º, may be measured using the Nexview™ NX2 profiler.
It accomplishes all of this in 3D without requiring physical touch and offers the advantages of other profiling methods (such as focus scanning, confocal, and stylus) without drawbacks.
Customers who require these capabilities can purchase additional application modules for specialized needs, such as 2D vision analysis and measuring in the presence of transparent materials.

Image Credit: Zygo Corporation
Automated Operation
Since the Nexview™ NX2 profiler is a fly-by-wire device with no manual controls, it may measure numerous surfaces, items in a tray, or regions of a surface in one measurement by stitching together multiple measurements. This allows for complete automation using preset sequences.
Clean, Streamlined, Design
The large work surface and excellent lines of sight of the Nexview NX2 profiler provide quick and easy setups and changeovers of measurements.
The prototype of a streamlined and effective industrial design is its automated 200 mm integrated measurement stage. With its integrated ±4º high load tilt stage and parcentric correction, it simplifies the process of aligning the measurement surface, even for samples lacking features.