Jun 3 2020
Some of the society’s major challenges can be primarily addressed through novel technologies—and a majority of these technologies feature an optical system at their hub.
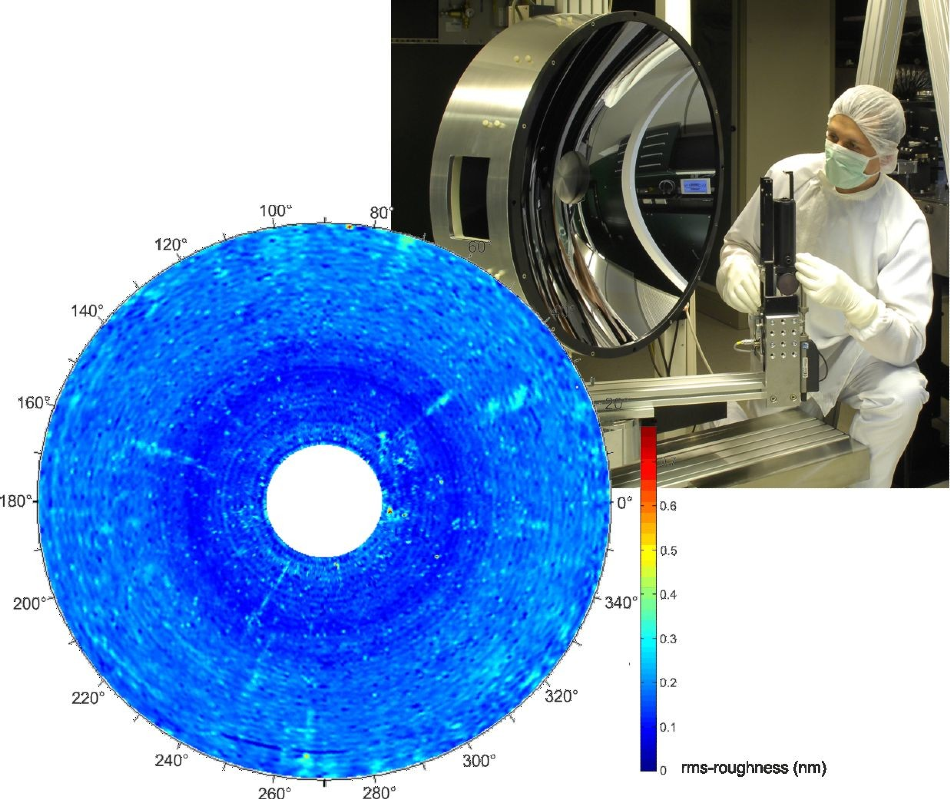
 Light scattering-based surface characterization of a substrate for EUV lithography. Image Credit: © Fraunhofer IOF.
A few examples comprise semiconductor lithography systems that are developed to produce high-resolution earth observation systems based on satellites, infinitely smaller and more energy-efficient microchips, and fundamental studies in the area of gravitational-wave detection.
But in the world of optics, even the smallest defects can result in scattered light, leading to a lower light yield and reduced contrast. Hence, existing optical systems depend on the improved design and detailed analysis of the entire surface of optical components.
To accomplish this task, the Fraunhofer Institute for Applied Optics and Precision Engineering (Fraunhofer IOF) is creating light scattering measurement methods that are capable of detecting unnecessary scattered light.
To attain the desired level of imaging quality, the surface quality of an optical surface is very important. No surface is entirely defect-free. For that matter, even crystals—which come quite close to denoting the perfect solid—have flaws and defects.
To achieve the correct balance right at the design phase of optical systems, comprehensive specifications are required in several areas, such as the degree of defective points on the surface that is assumed to be acceptable and the extent to which any required coatings and other factors may have an impact on these values.
Such information can be offered by Fraunhofer IOF, which produces an array of light scattering measurement sensors and systems and also the matching light scattering models and analytical techniques. With the help of these tools, a virtual coating can be applied that would enable researchers to make predictions on light scattering phenomenon before the actual production occurs.
These measures also provide new opportunities for in-line characterization of complex optics—this means carrying out automated inspection and performing in-depth analyses of a surface depending on its construction and design datasets.
These tools can help get the optimum balance between manufacturing costs and useful benefits. The optics used in satellites are a good example. The challenge here is to produce multiple optics of the same type—for example as a flight model, reset module etc.—while operating at the limits of what is technically feasible in a production environment in particular for applications at short wavelengths.
Marcus Trost, Head of the Characterization Group, Fraunhofer Institute for Applied Optics and Precision Engineering
Trost continued, “That’s why it is so important to rely on robust and meaningful, in-line analyses offered by light scattering measurement techniques.”
Light Scattering Measurement Technique Offers Clear Benefits
Generally, surface defects are quantified by interferometry, microscopy, or tactile techniques in which the surface is probed with a diamond needle. But these methods are costly and involve a considerable amount of time.
Light scattering measurement systems have already provided a tried-and-tested option for smooth surfaces, integrating high sensitivity with non-contact, rapid measurements.
Moreover, these systems are resistant to vibrations, rendering them an extremely powerful alternative. As a case in point, it would take more than four decades to examine the whole surface of a 60-cm diameter mirror through an atomic force microscope, but the same kind of task could be completed in just a few hours using light scattering methods.
This fact makes this technique an excellent choice for fulfilling the ever-increasing needs of research and industry for optical components. It even helps to fulfill the high quality and functional standards while improving the production times and costs.
Fraunhofer IOF is already meeting the global demand for optics characterization from optical system producers, and the company has also developed a strong network of know-how in Germany’s “Optics Valley”—a group of high-tech firms in the Jena area.
Satellite Missions Already Benefiting
Fraunhofer IOF has already provided its know-how for producing and improving a number of satellite optics, such as the Environmental Mapping and Analysis Program (EnMAP) of the German Aerospace Center. Beginning this 2020, the aim of this project is to gather the most comprehensive and spectrally resolved data ever achieved on ecosystems on the surface of the Earth.
Moreover, Fraunhofer IOF’s skills have been used on the multispectral Earth observation applications that represent part of the Sentinel program of the European Space Agency. In addition, the European Space Agency will be launching a novel telescope into space in 2020—the Euclid space telescope will conduct a new survey relating to the farthest influences of the universe, thus paving the path for a deeper understanding of dark energy and dark matter.
Ready to be Integrated into Production
Contrary to conventional measurement methods, this technique is resistant to vibrations, rendering it easier to integrate into production processes. As a case in point, the above image depicts the incorporation of a miniaturized light scattering sensor in an ultra-precision diamond turning machine that was exclusively created for the flexible and fast characterization of defects and roughness.
Using this approach, the surface roughness can be characterized in-line in the production process and even process parameters can be changed as required.
The measurement systems of Fraunhofer IOF also fulfill the condition of the Fraunhofer lighthouse project “Hierarchical swarms as production architecture with optimized utilization (SWAP)”.
The aim of this project is to detect novel technological ideas to mold the future of production. The project mainly focuses on the migration from conventional workpiece processing in a defined series of processes to a more (semi-)autonomous and collaborative production.